This is a guide to change the BIOS settings to boot your live USB. The BIOS stands for Basic Input output system, which defines the basic settings for hardware that is used for initial boot up settings of the device. It defines from where the OS will boot first, also the virtualization capabilities can be enabled and disabled from here. The system password can be changed from bios and a lot of other features.
Different company’s devices have different ways to reach the BIOS settings. Mine is Sony and Sony provides assist button to do that.
Check here, If you can find your laptop’s or PC’s Bootup settings here.
Below are the steps to follow to change your BIOS settings, So your External USB device boots up first:
- Open the BIOS settings. Different Laptops have different ways to visit BIOS settings. Mine is Sony and it has an assist button to change BIOS settings. You can search on google for your laptop specification.

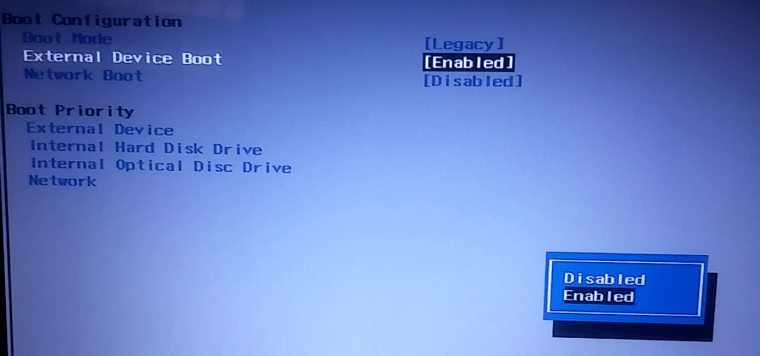
2. Go to the Boot menu and Change the boot mode to Legacy. Legacy boot mode are used to run legacy systems. If you are going to run any linux like operating system use this mode. Even old windows uses legacy but after windows 7 they started with UEFI which is booting mode for new OS.


2. Enable the External Device Boot. It will allow USB to be used as a External device to boot.
3. Change the boot priority. You have to put external device as top of the priority.
The screenshot below will let you know what things you have to look for and change.


That is all!
If you have any troubles doing that, You can ask in comments below.

